DIY Pull Out Accordion Photo Box
How to Make this DIY Pull Out Accordion Photo Box
Whether you gift this for Valentine’s, an anniversary, or even just because, this is perfect for the occasion! A gift from the heart, this DIY accordion photo box is a project you get to make with your hands, something sentimental, inexpensive & one you can keep forever!
We made it easy for you, just follow these 5 easy steps to create this love-exploding gift! Keep reading to get started!
materials needed:
30 or more photos (hello Persnickety Box app!)
A gift box to hold your prints
Clear tape
A pen & paper
A ribbon (optional)
Step By Step:

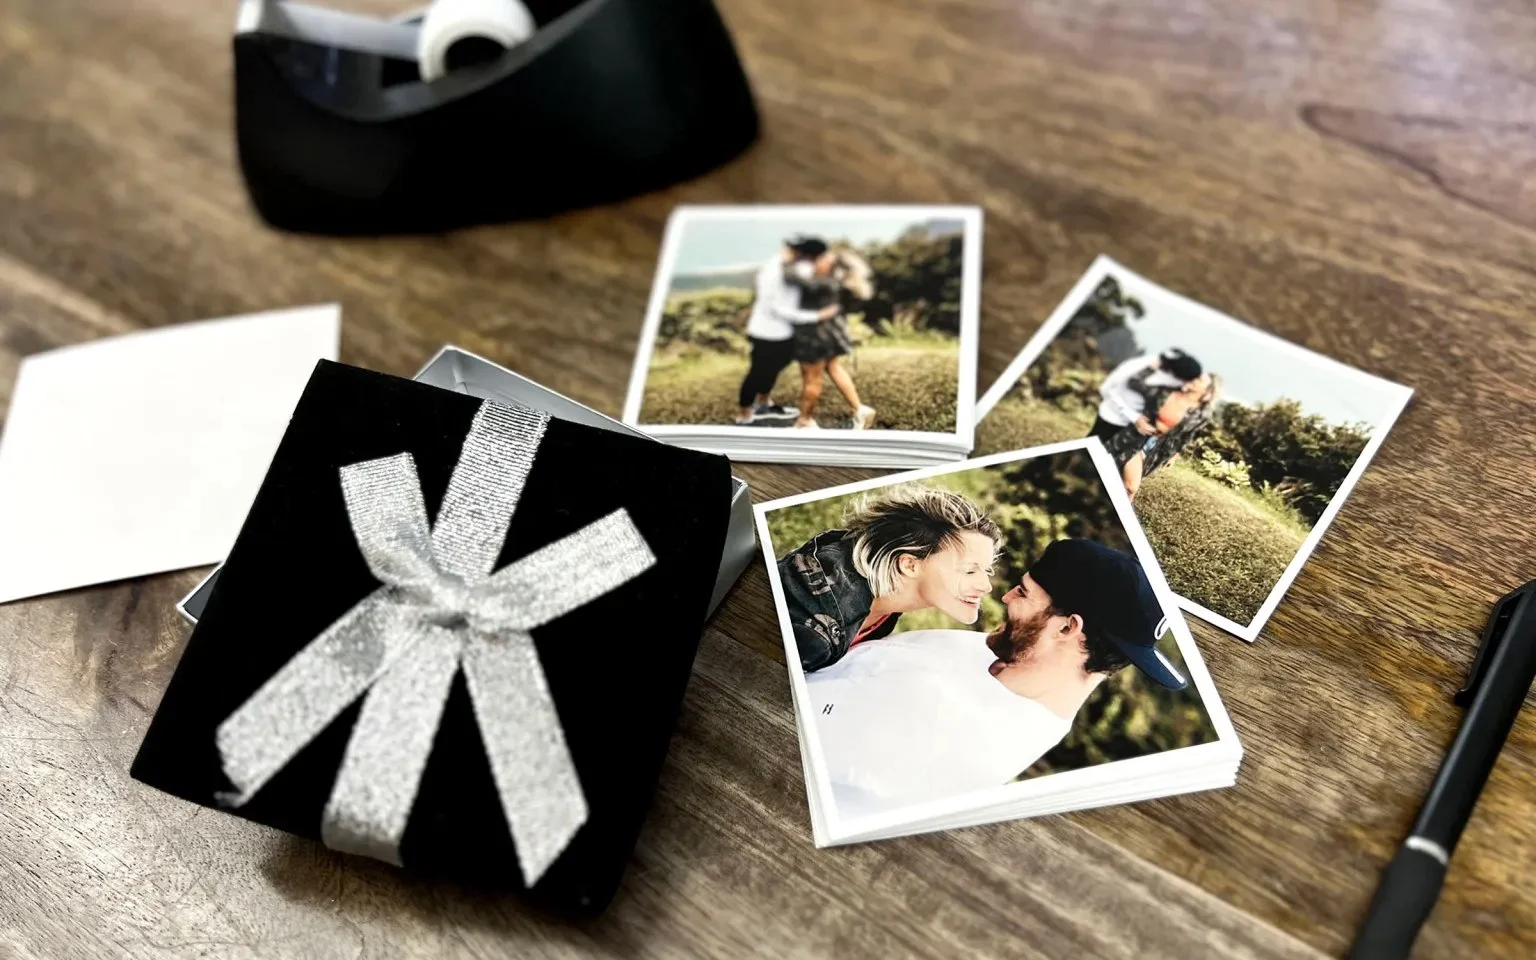
STEP 1: FIND A BOX
Find a cute box to hold all your pics. Or, find a not-so-cute box and get crafty! Paint, ribbon, and stickers can spice up an old box into something amazing! What matters here is that it can fit your photos.
We found this 4×4″ black and silver box from the Dollar Tree… such a major score! Check your local dollar stores, Target, craft stores, or even Amazon for the perfect box! If doing an online search, look for “4×4 jewelry gift boxes”, or even “square gift card boxes” to find great options.

STEP 2: close a box
Pick out your favorite photos of your loved one and swipe them into your Persnickety Box! We recommend using our photographic prints for this project. They have great printing quality, will last the longest too!
We used 30 photos, perfect use of one of your Persnickety Boxes! Double check your gift box size before printing your pics to make sure that your box is big enough to fit these 4x4 prints. Swipe them into the app and close one of your Persnickety Boxes. Once your photos arrive, you can begin to assemble the box.
Not a member yet? Download the Persnickety Box app now and get 30 photos sent right to your door, every month!
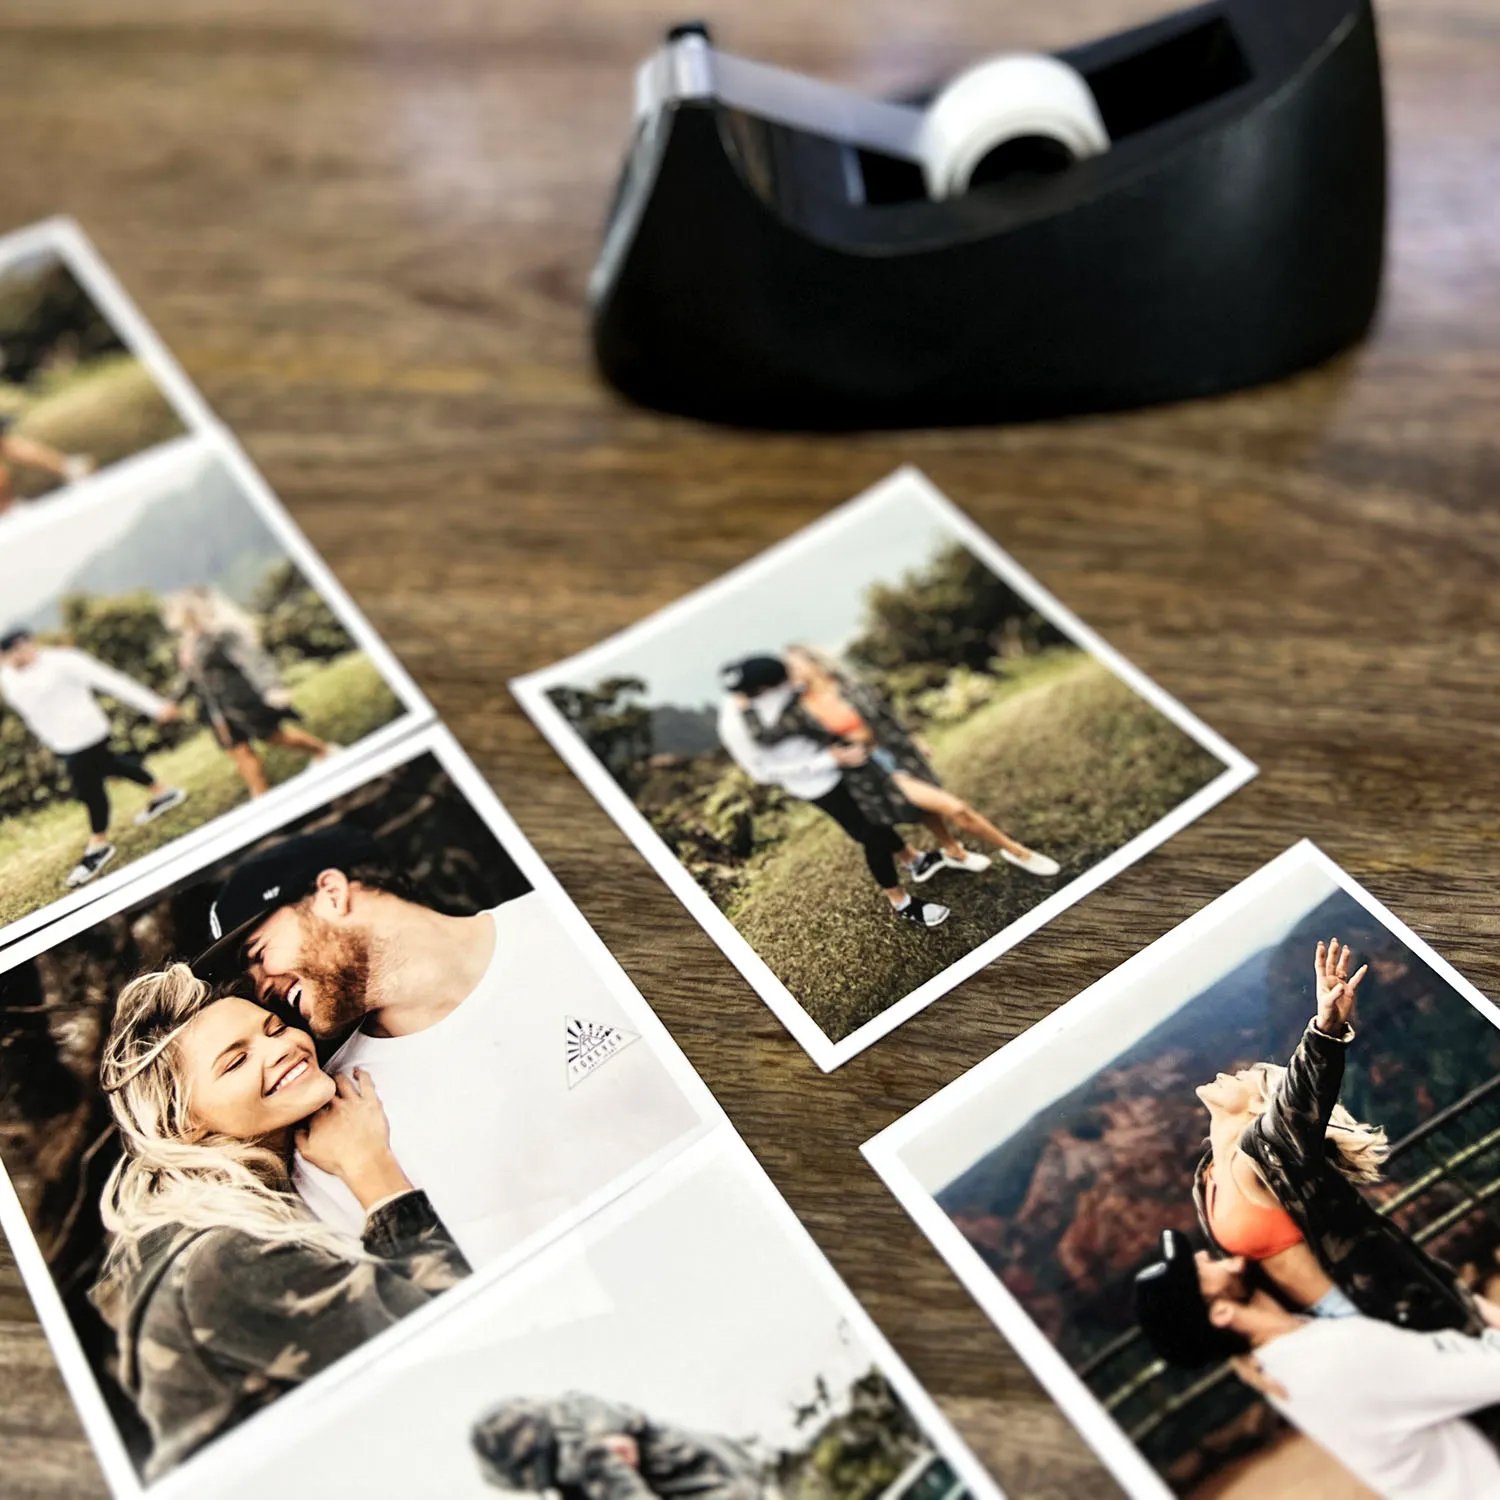
STEP 3: ASSEMBLE pics
Flip through your photos and organize them in the order you would like them to be pulled out of the box. Line the bottom of your first photo with the top of your second photo and add a small piece of clear tape to attach them. (The amazing part about using Persnickety Boxes photographic prints is that the tape can easily be removed from the images with no damage! Like magic! Great if you want to reuse these photos or if you make a mistake.)
Be sure the photos are not overlapping, or they will not easily or neatly fold when placed into your box. Continue this step until you have a big chain of adorable pics!
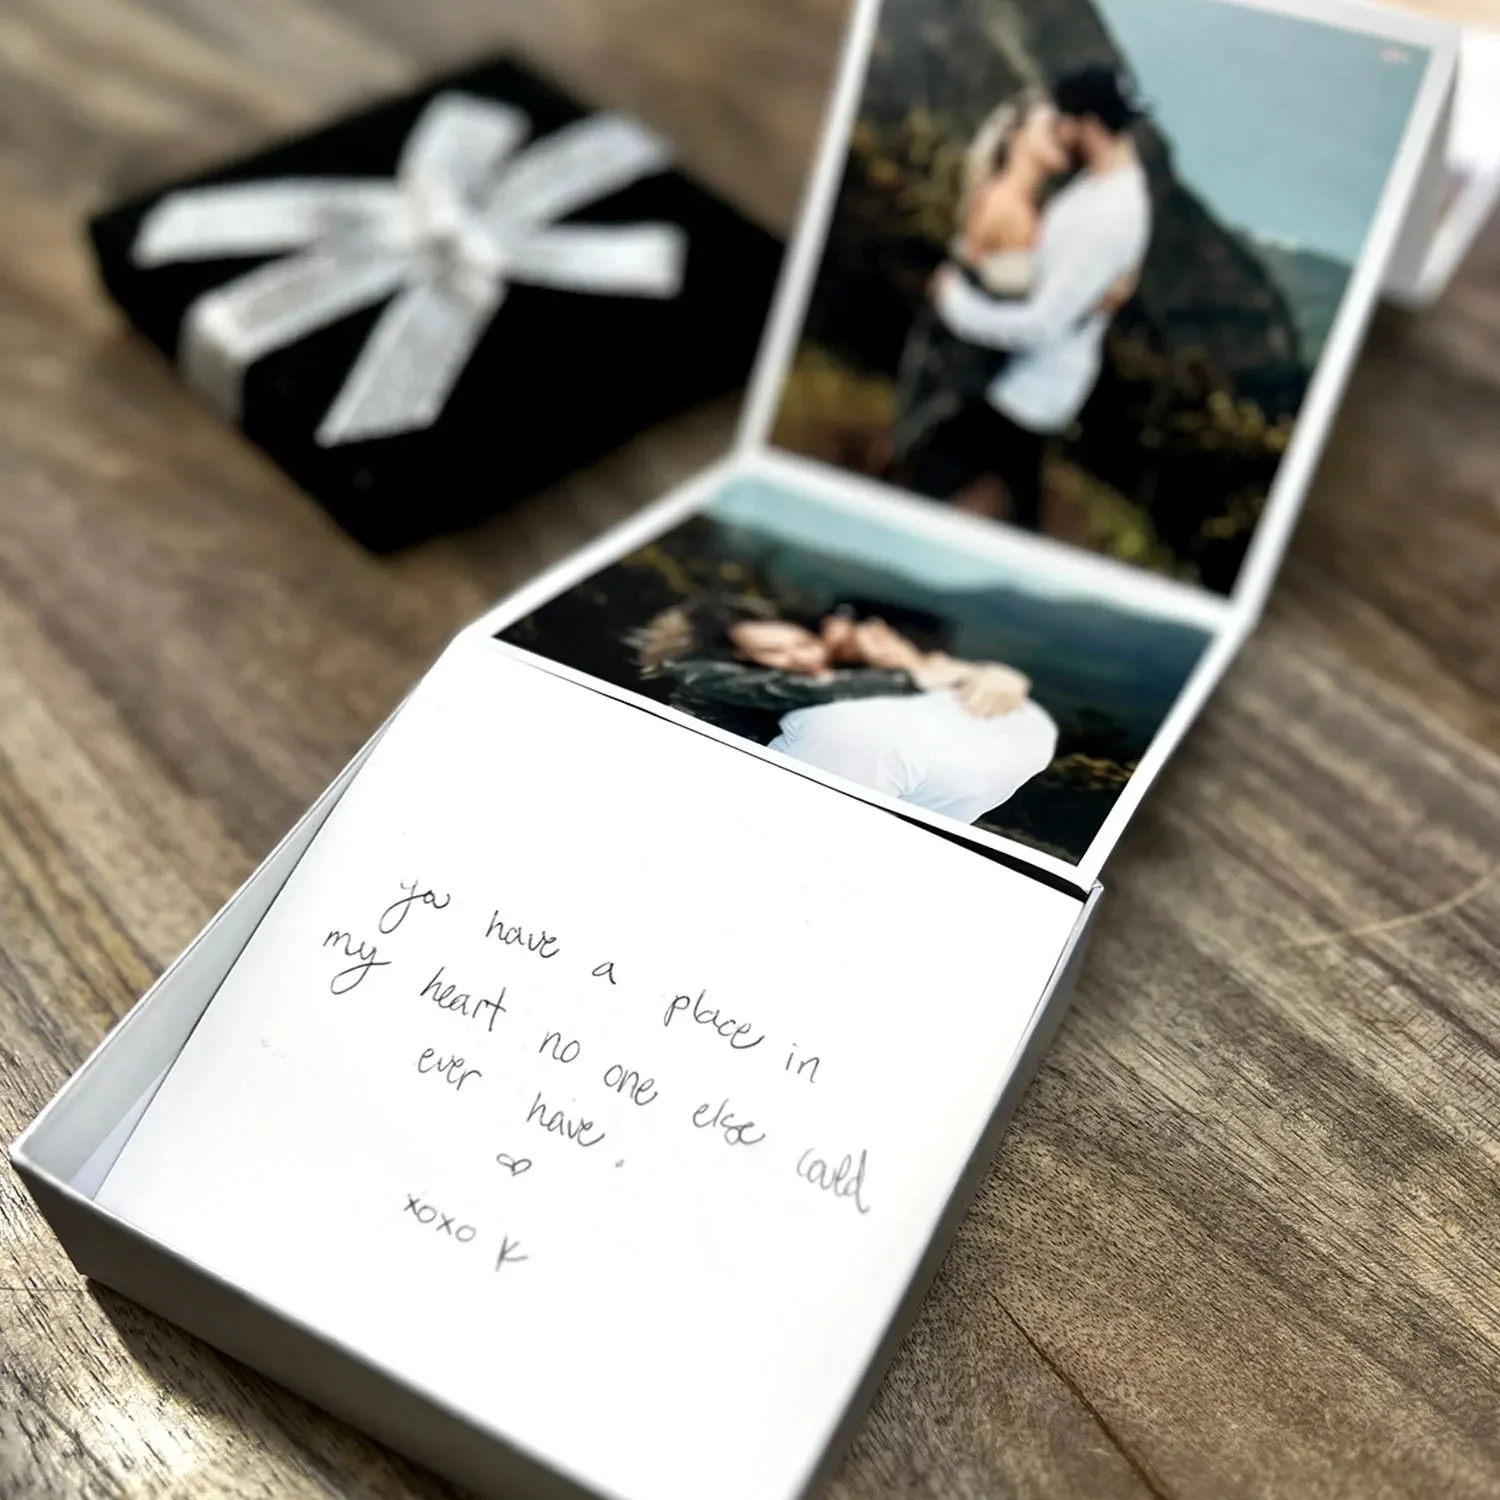
STEP 4: write A LOVE LETTER
For the cherry on top to this heart melting gift, add a love note to the very end of the chain as a surprise for your gift recipient.
Cut piece of thick, card stock paper to the same size as your photos; for ours, a 4×4″. Profess your undying love and pour out your heart onto the card. Making it even more personal, use your own handwriting rather than typing something out. ;) Then, tape this love note to the very last photo on the chain, just like you did with the photos.
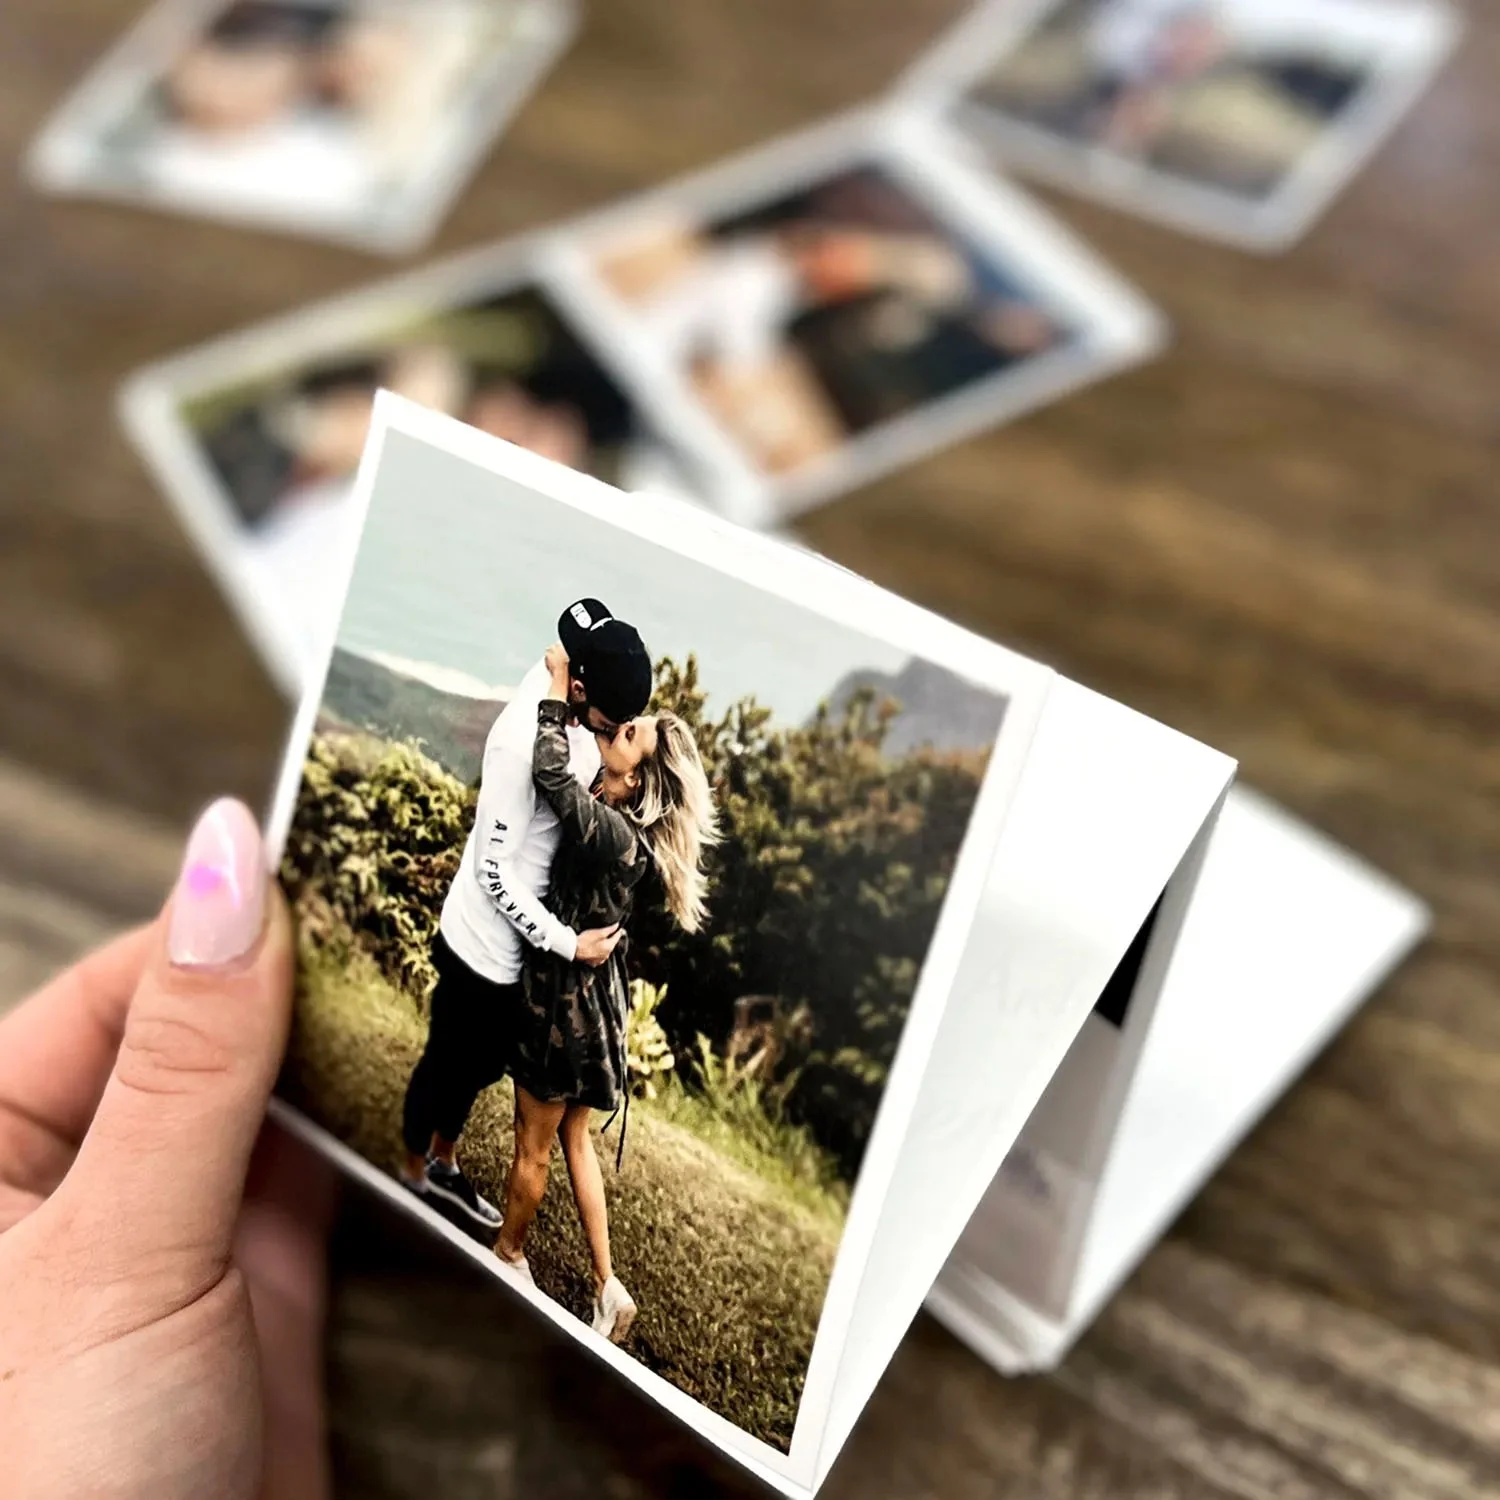
STEP 5: FINAL TOUCHES
Now it is time to accordion fold them into your box. Start with your first photo, face up. Take the second photo and fold it under, behind the first. Continue this pattern until they are all folded behind one another. Neatly place them into your gift box!
An optional final touch:
We added a “pull” tab to the very first photo. To do this, we taped a ribbon loop to the back side of the first image. This makes it a bit easier to get the accordion of photos started when your gift box doesn’t have much room to grab the photos with your fingers.
GIFT YOUR PHOTOS
You did it! You created the most precious and endearing gift of all time! Get ready to watch them open the gift from your heart and just wait for the tears to start to start flowing from their eyes. Photos mean the most. Memories, nostalgia, feelings, and emotions are all brought to surface when looking at photos. Make someone feel extra special and loved with this accordion photo box DIY.
